
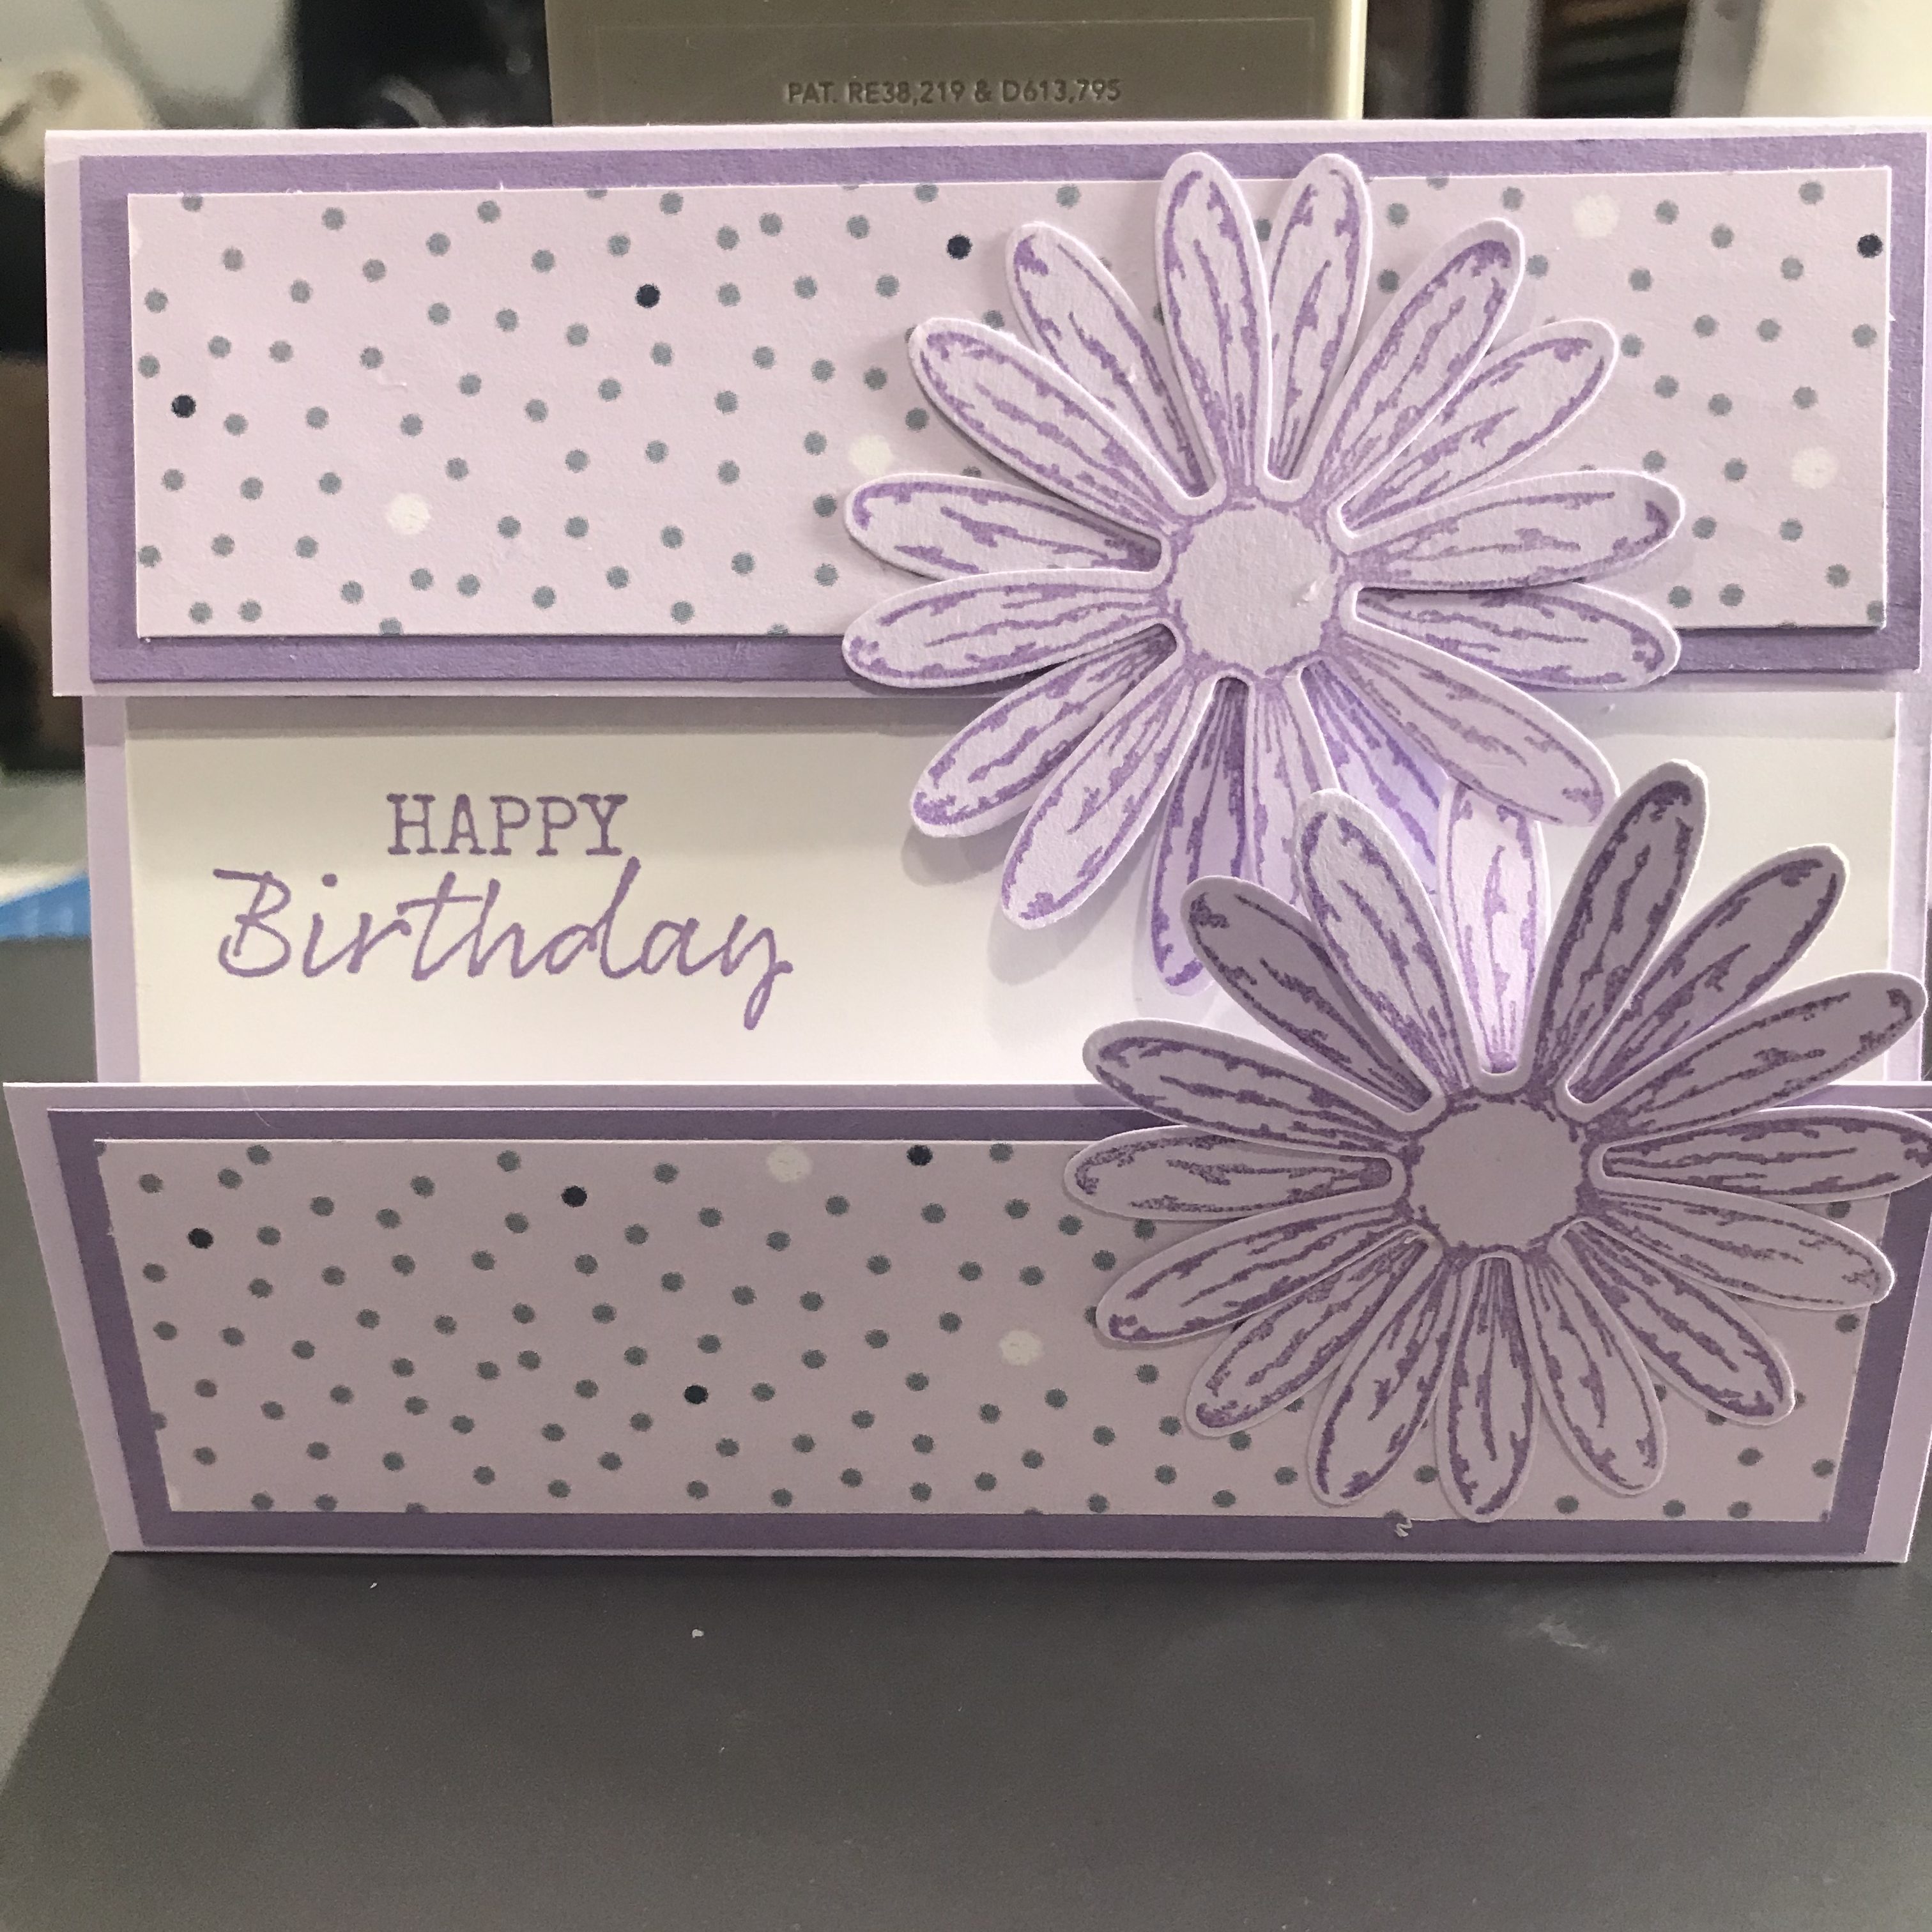
Looking to brighten up someone’s birthday with a daisy or two in beautiful Highland Heather, then here’s a modified take on the Centerfold card that gives it a little more interest.
Cardstock Dimensions:
Purple Posy – base – 7 ½ x 5 ½ and scraps for 4 punched Daisies
Playing with Patterns DSP – (2) 5 x 1 1/4
Highland Heather – 5 ¼ x 4 and (2) 5 ¼ x 1 ½
Whisper White – 5 ¼ x 3 ¾
You will also need:
Stamp Sets:
Daisy Lane – Stamp 4 Large Daisies and punch out using Daisy Punch
Seaside Notions – Happy Birthday
Ink:
HIghland Heather
Punch:
Daisy Punch
½ inch Circle Punch
Assembling your card:
- Score at 1 5/8 on each side of base
- Adhere the DSP to the Highland Heather (5 ¼ x 1 ½ )then adhere to the top and bottom flaps of the card (ensure you have the proper direction if your DSP is directional)
- Adhere the Highland Heather 5 ¼ x 4 to the inside of the card and place the Whisper White on top where you want it to go (but do not adhere yet). Then close card and put a small pencil dot in the center of Whisper White on the left hand side. Now remove the Whisper White and stamp your sentiment to the right of the pencil mark. And stamp the small daisy from the Daisy Lane above the sentiment so that it does not show through the opening.
- Adhere the Daisy’s together (2 punched for each daisy) and then adhere them to the right of the card – one on top and one on the bottom flap slightly overlapping them.
Discover more from Stamping With MB
Subscribe to get the latest posts sent to your email.
