

Thanks to so many talented people for sharing their Pocket Fold cards. Using a 12 x 12 sheet one inch off the bottom and cut 3 1/2 off the side – now you are working with a piece that is 11 x 8 1/2 inches. Before cutting take note if there is a direction to the Designer Series Paper. Don’t forget to save the extra pieces for another card.
How to fold your card:
The design you want to show on the front of your card should be facing Fold the paper in half lengthwise and burnish. Open the paper back up. Fold and paper horizontally in half and burnish.
Now place the design you want to show on the front of your card facing down onto the table.
Cut the paper on the fold mark from the center score mark to the left edge. (you are basically cutting half the card in half.
Now fold the paper at the top left corner at a 90 degree angle at about the 3 inch mark.
Now fold the bottom left corner at a 90 degree angle at the score line.
Fold the top left portion to the top right, then fold the bottom half up to the top, and wrap the left hand side to the back. You now have 2 pockets. You should adhere the the pockets together on the very edges on the right and left so the card can still open and you have 2 secure pockets.
See video below.
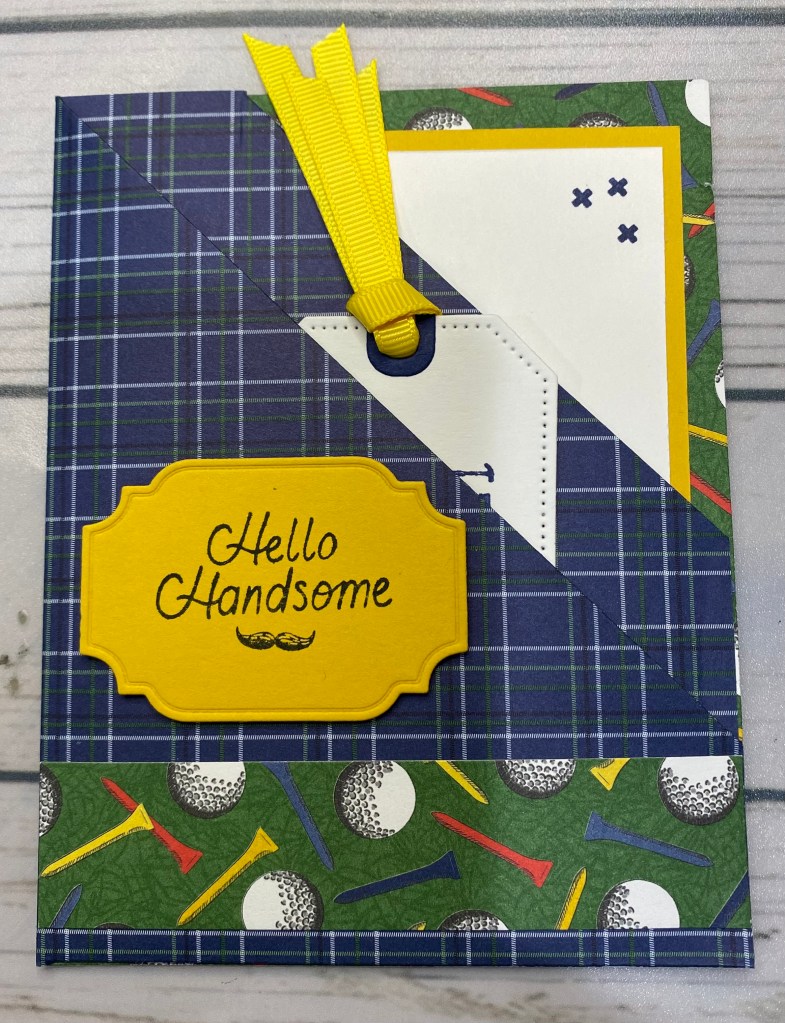
Front Pocket for Bookmark
Thick Basic White – Die cut the largest tag from Tailor Made Tags and stamp your sentiment on the tag
Coordinating Cardstock or Basic Black – die cut 2 reinforcements for your tag and adhere them to either side of the hole.
Coordinating Ribbon – cut 6 inches and loop through the bookmark. Insert in the front pocket
You can also forgo the bookmark and insert a gift card!
Back Pocket for Sentiment card
Basic White – 3 1/2″ x 4 1/2″ Stamp sentiment on front
Coordinating Cardstock or Basic Black 3 3/4″ x 4 3/4″ – adhere the stamped sentiment piece to this piece and place in back pocket
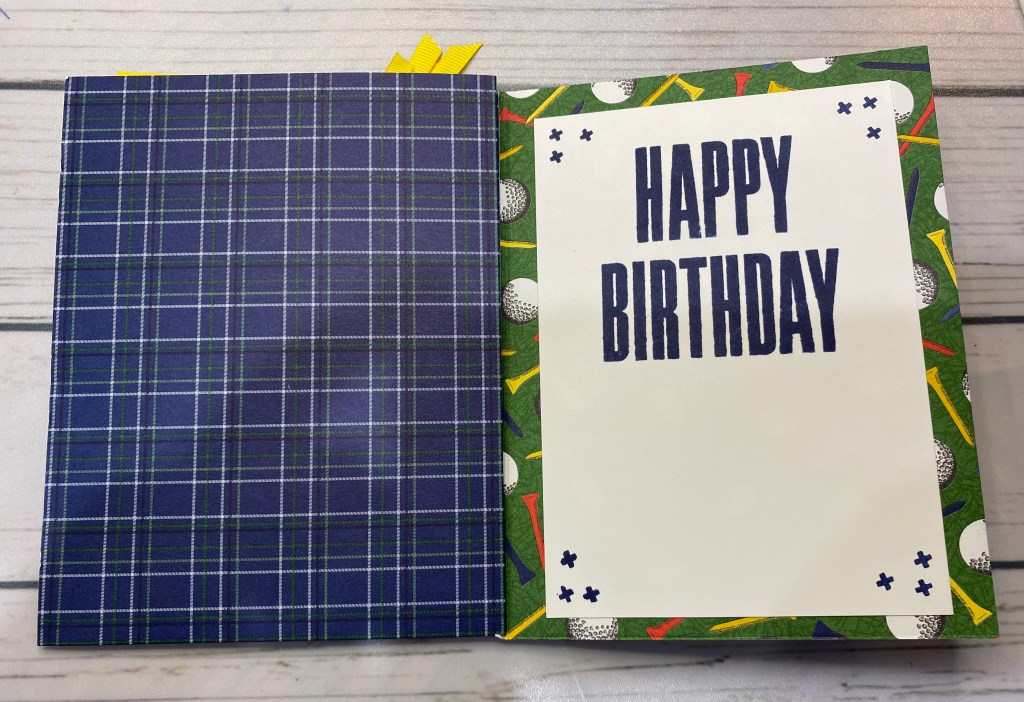
Inside of Card
Basic White 3 1/2″ x 5″ – stamp sentiment and adhere to inside of card.
Front of card
From the left over 1 inch Designer Series Paper add a 4 1/2″ strip to the front bottom of the card. Be sure not to cover up your pocket.
Using a coordinating color cardstock and All That Dies – Die cut a tag, stamp a sentiment and adhere with dimensionals.
Discover more from Stamping With MB
Subscribe to get the latest posts sent to your email.
