
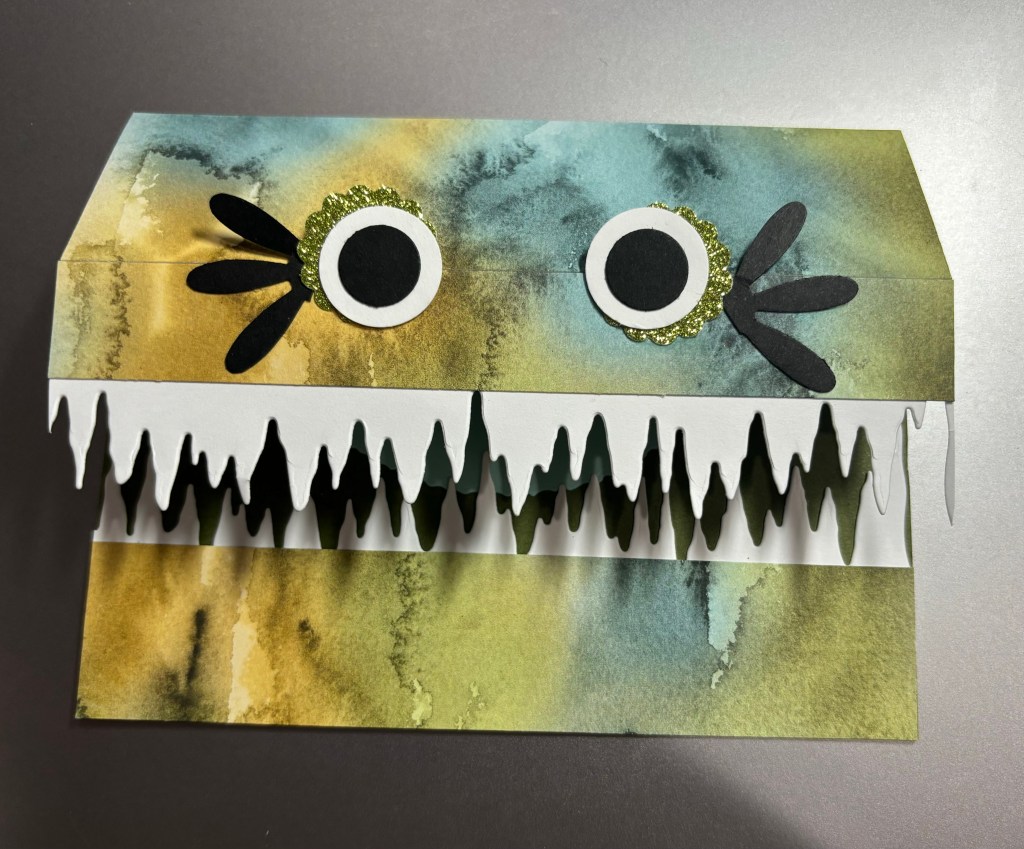
This card is just adorable. I first saw it done by Rachel Tessman and then Gail Murry demonstrated it at our ‘Stamp Out Cancer’ event.
I have turned this card into a gift card holder on the back. However, you can add just a sentiment to a Basic White 5 x 3 3/4 piece of cardstock.
Here are the measurements for the card:
Mossy Meadow Card Base – 5 1/2 x 8 3/8 – score at 4 1/4, 5 7/8, 6 3/8 and 8
Pool Party 2 1/4 x 4 – Tongue
Basic White Card Stock – 2 x 6 for teeth and 3 1/2 x 3 3/4 for gift card holder for back on card
Thoughtful Journey Designer Series Paper (or something that looks similar to the card shown). Design which way you want the DSP to appear on the card – then cut 1/2 off the right side of the paper. (Is will make the following measurements easier to cut.
– 1 5/8 x 5 1/2
– 3/4 x 5 1/2
– 1 1/8 x 5 1/2
Scraps of the following:
Basic Black – for eyes and eyelashes
Basic White – for eyes
Glimmer Paper to match or accent your card stock base. You can also use the same color as your card base.
Use the following punches for the eyes – (most of these are retired but I’m sure you have them in your stash.
Small Daisy – Cut one from the Basic Black scraps. You will cut this up to 3 eyelashes per eye, so for 1 card you will only need to punch 1 Daisy
1/2 inch circle punch from the Basic Black scrap for the center of the eye
3/4 inch circle punch from the Basic White for the eye
7/8 inch scalloped punch from the Glimmer Paper or the same color cardstock as your base.
Die cut the Pool Party using the Deckled Circles Dies 7th from the largest circle (note – it will not cut a full circle because you only need part of a full circle for the tongue) – Stamp a Happy Birthday sentiment onto the tongue. I used the Happy Birthday to You from the retired ‘Zany Zoo’ stamp set. Set aside till we assemble the card.
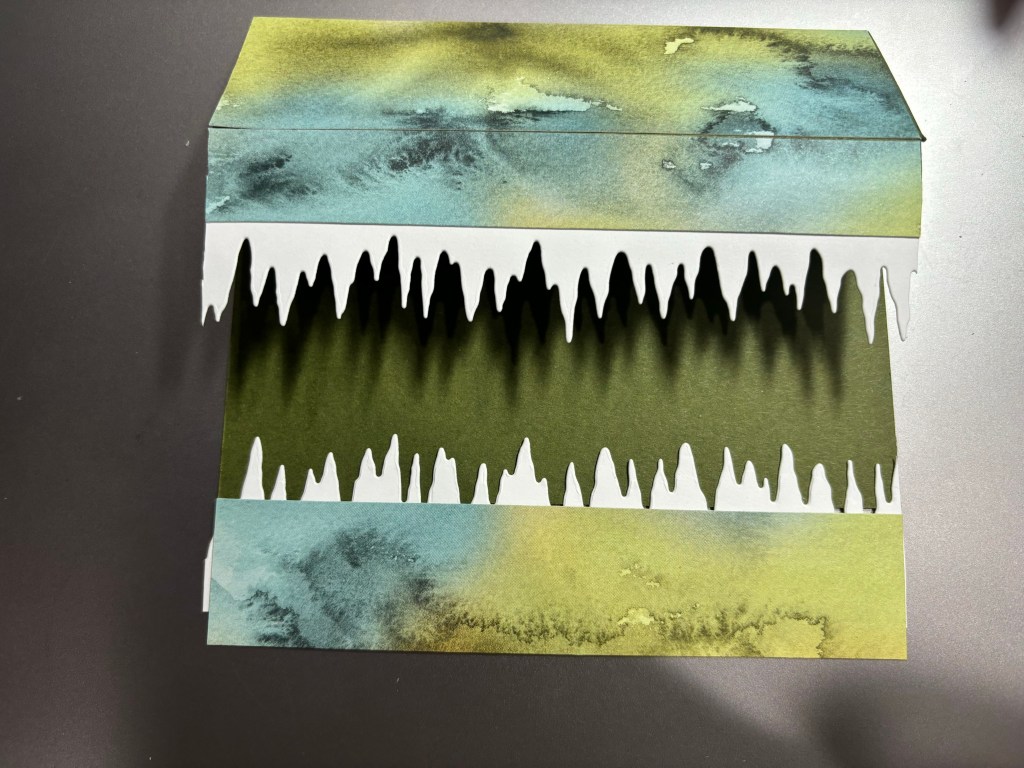
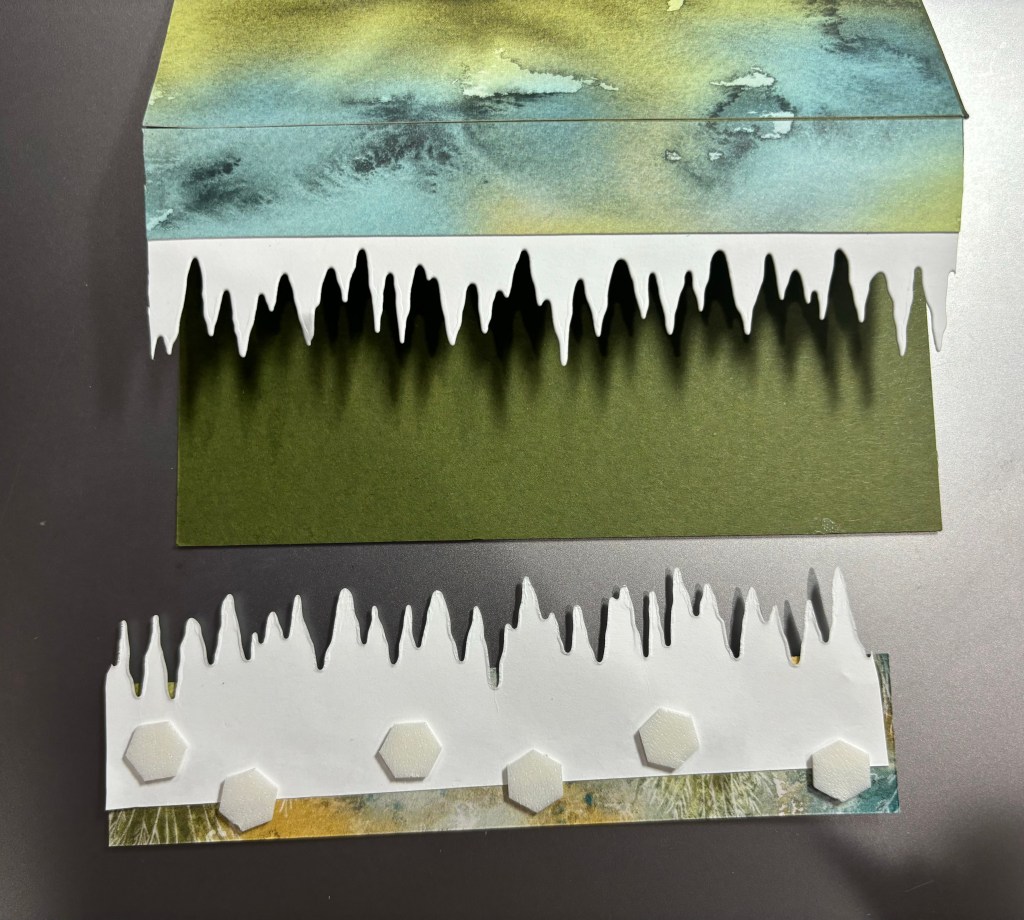
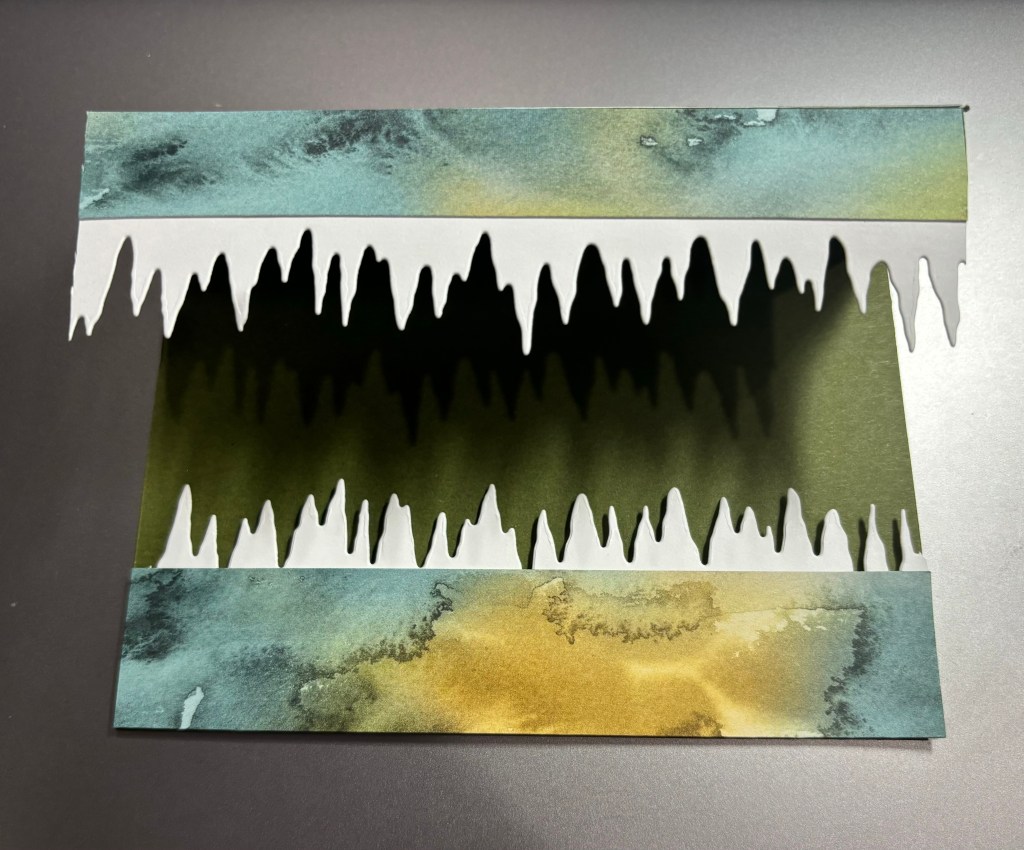
Die cut the Basic White 2 x 6 using the die from the Frozen Edges Die. Note this will be longer than you need on your card but we will trim it to fit. The provides you with a set of teeth to use.
Assemble the card:
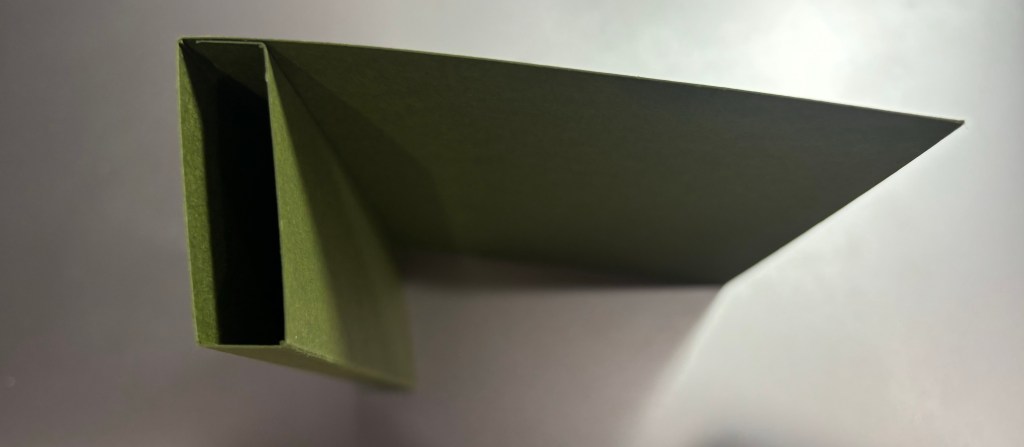
using Tear and Tape add tape to the card base 3/8 piece and then you will fold that under to make a box as shown in the picture.
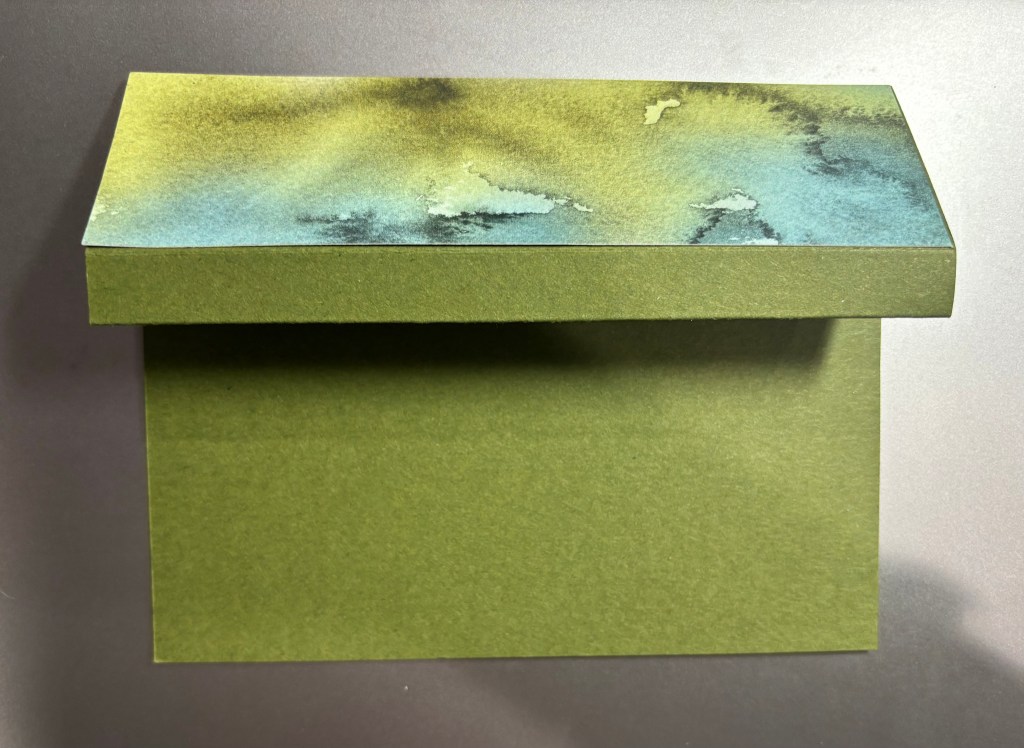
Adhere the 1 5/8 piece of Designer Series Paper to the top of the card. See picture.
Adhere the Frozen Edges to the 3/4 in piece (note the teeth will hand over both edges. and then adhere to the card on the 1/2 piece of cardstock. See picture.

Adhere the DSP only to the card. See picture
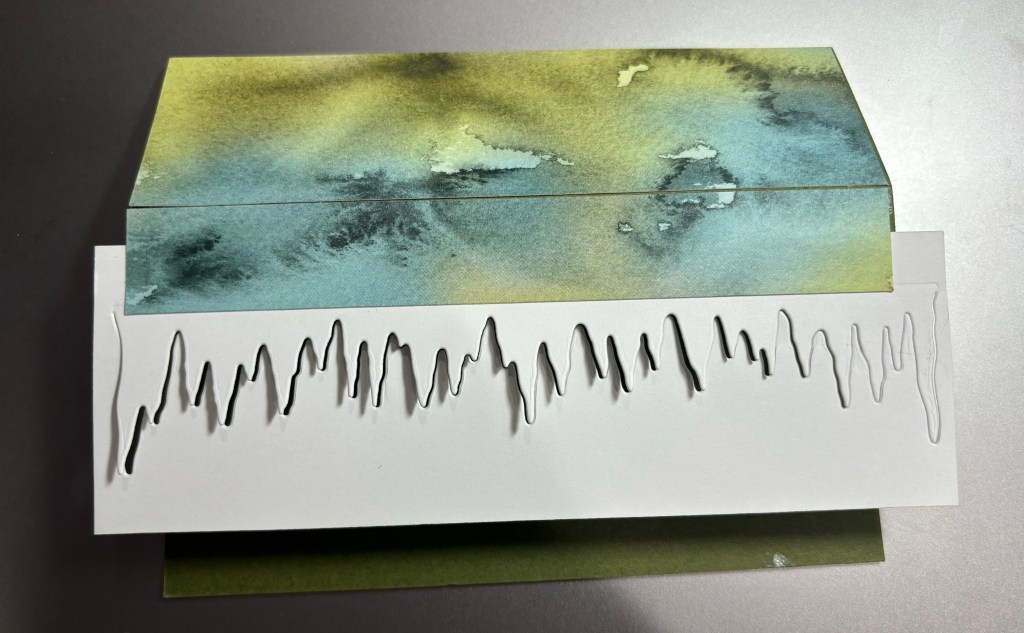
Trim the teeth to the size of the card.
Now place the teeth together and add the next piece of DSP 1 1/8 x 5 1/2. Ensure you are only putting adhesive where the two meet, do not add adhesive to the full portion of the teeth and DSP, as we will be adding dimensional to this piece. Add dimensional and then place at the bottom of the card. See picture.
Add the stamped tongue to the inside center of the card as shown in picture.

Now put the eyes together as shown in picture and only adhere them the top portion the the DSP that measures 3/4 x 5 1/2. as you can see I added the black part of the eye to the center bit then make them a little off center onto the next piece. Once your eyes are on cut 3 of the daisy to make yet lashes and sneak them behind the eye however you want them to look.

To the back of the card add the gift card holder as shown below. I used the sentiment from the ‘Zany Zoo’ stamp set and also used the 2nd largest die from the Pocket Thoughts Dies. You can always use a plain 5 x 3 3/4 inch Basic White if you don’t want a gift card holder.

I hope you have as much fun as I did making this card.
Tools I used in making this card:
Zany Zoo stamp Set – retired
Frozen Edges #164103
Pocket Thoughts Dies # 163552
Deckled Circle Dies # 162286
Memento Ink # 132708
Punches – 1/2 inch circle, 3/4 inch circle, 7/8 inch scalloped circle and small Daisy. All punches I used were retired, however you can absolutely find the same items amongst your dies as Rachel did.
Thoughtful Journey Designer Series Paper # 163303
Mossy Meadow Cardstock # 133676
Pool Party Cardstock # 122924
Basic White Cardstock # 159276
Discover more from Stamping With MB
Subscribe to get the latest posts sent to your email.
