
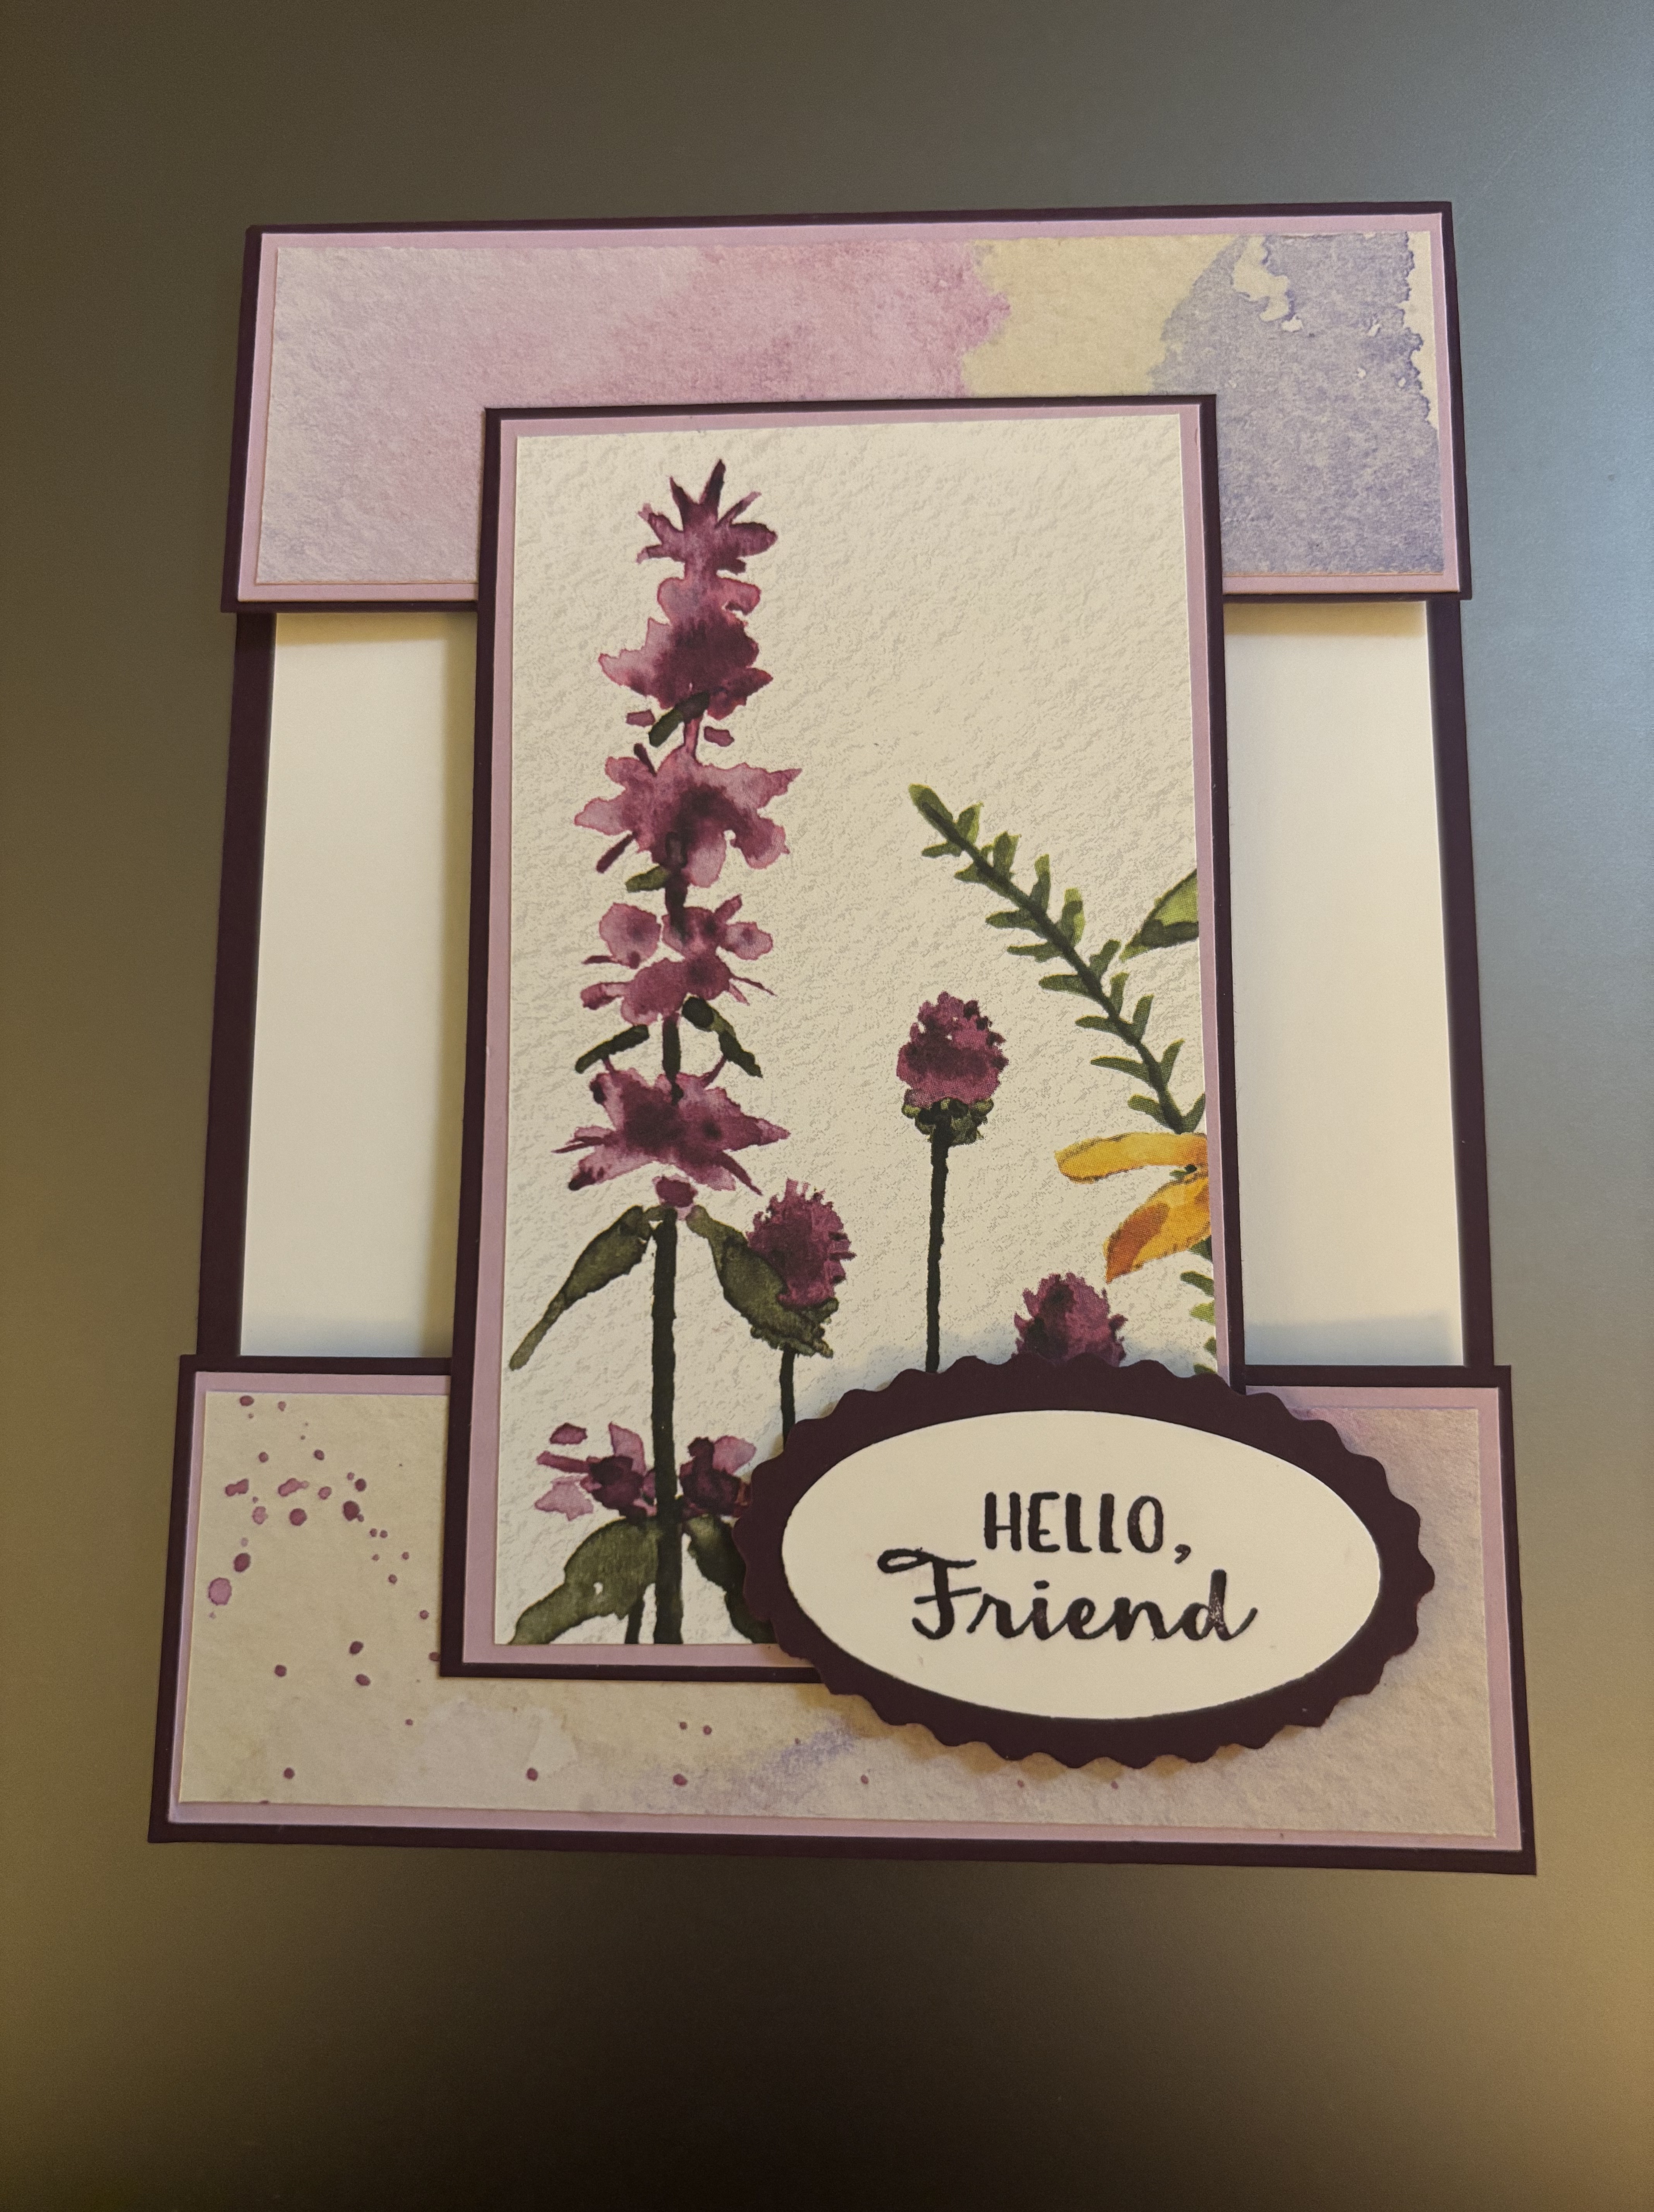
Card Measurements
Card Base – 11 x 4-1/4. Score at 5-1/2. On one side of the fold cut 1-1/2 inches off, then cut 2-1/2 inches off. You will use these for the front bottom and center of the card.
First Layer – use coordinating card stock to match your Card Base and Designer Series Paper (DSP)
2 at 4-1/8 x 1-3/8, 1 at 4-1/8 x 2-3/8
Designer Series Paper – 2 at 4 x 1-1/4 (landscape if you have a design), and 1 at 4 x 2-1/4 (portrait for your design) – I used Dainty Flowers #160834 (Retired)
Sentiment piece – I used the Double Oval Punch. The scalloped piece in the color of your card base and the regular oval in either Basic White or a scrap of your DSP.
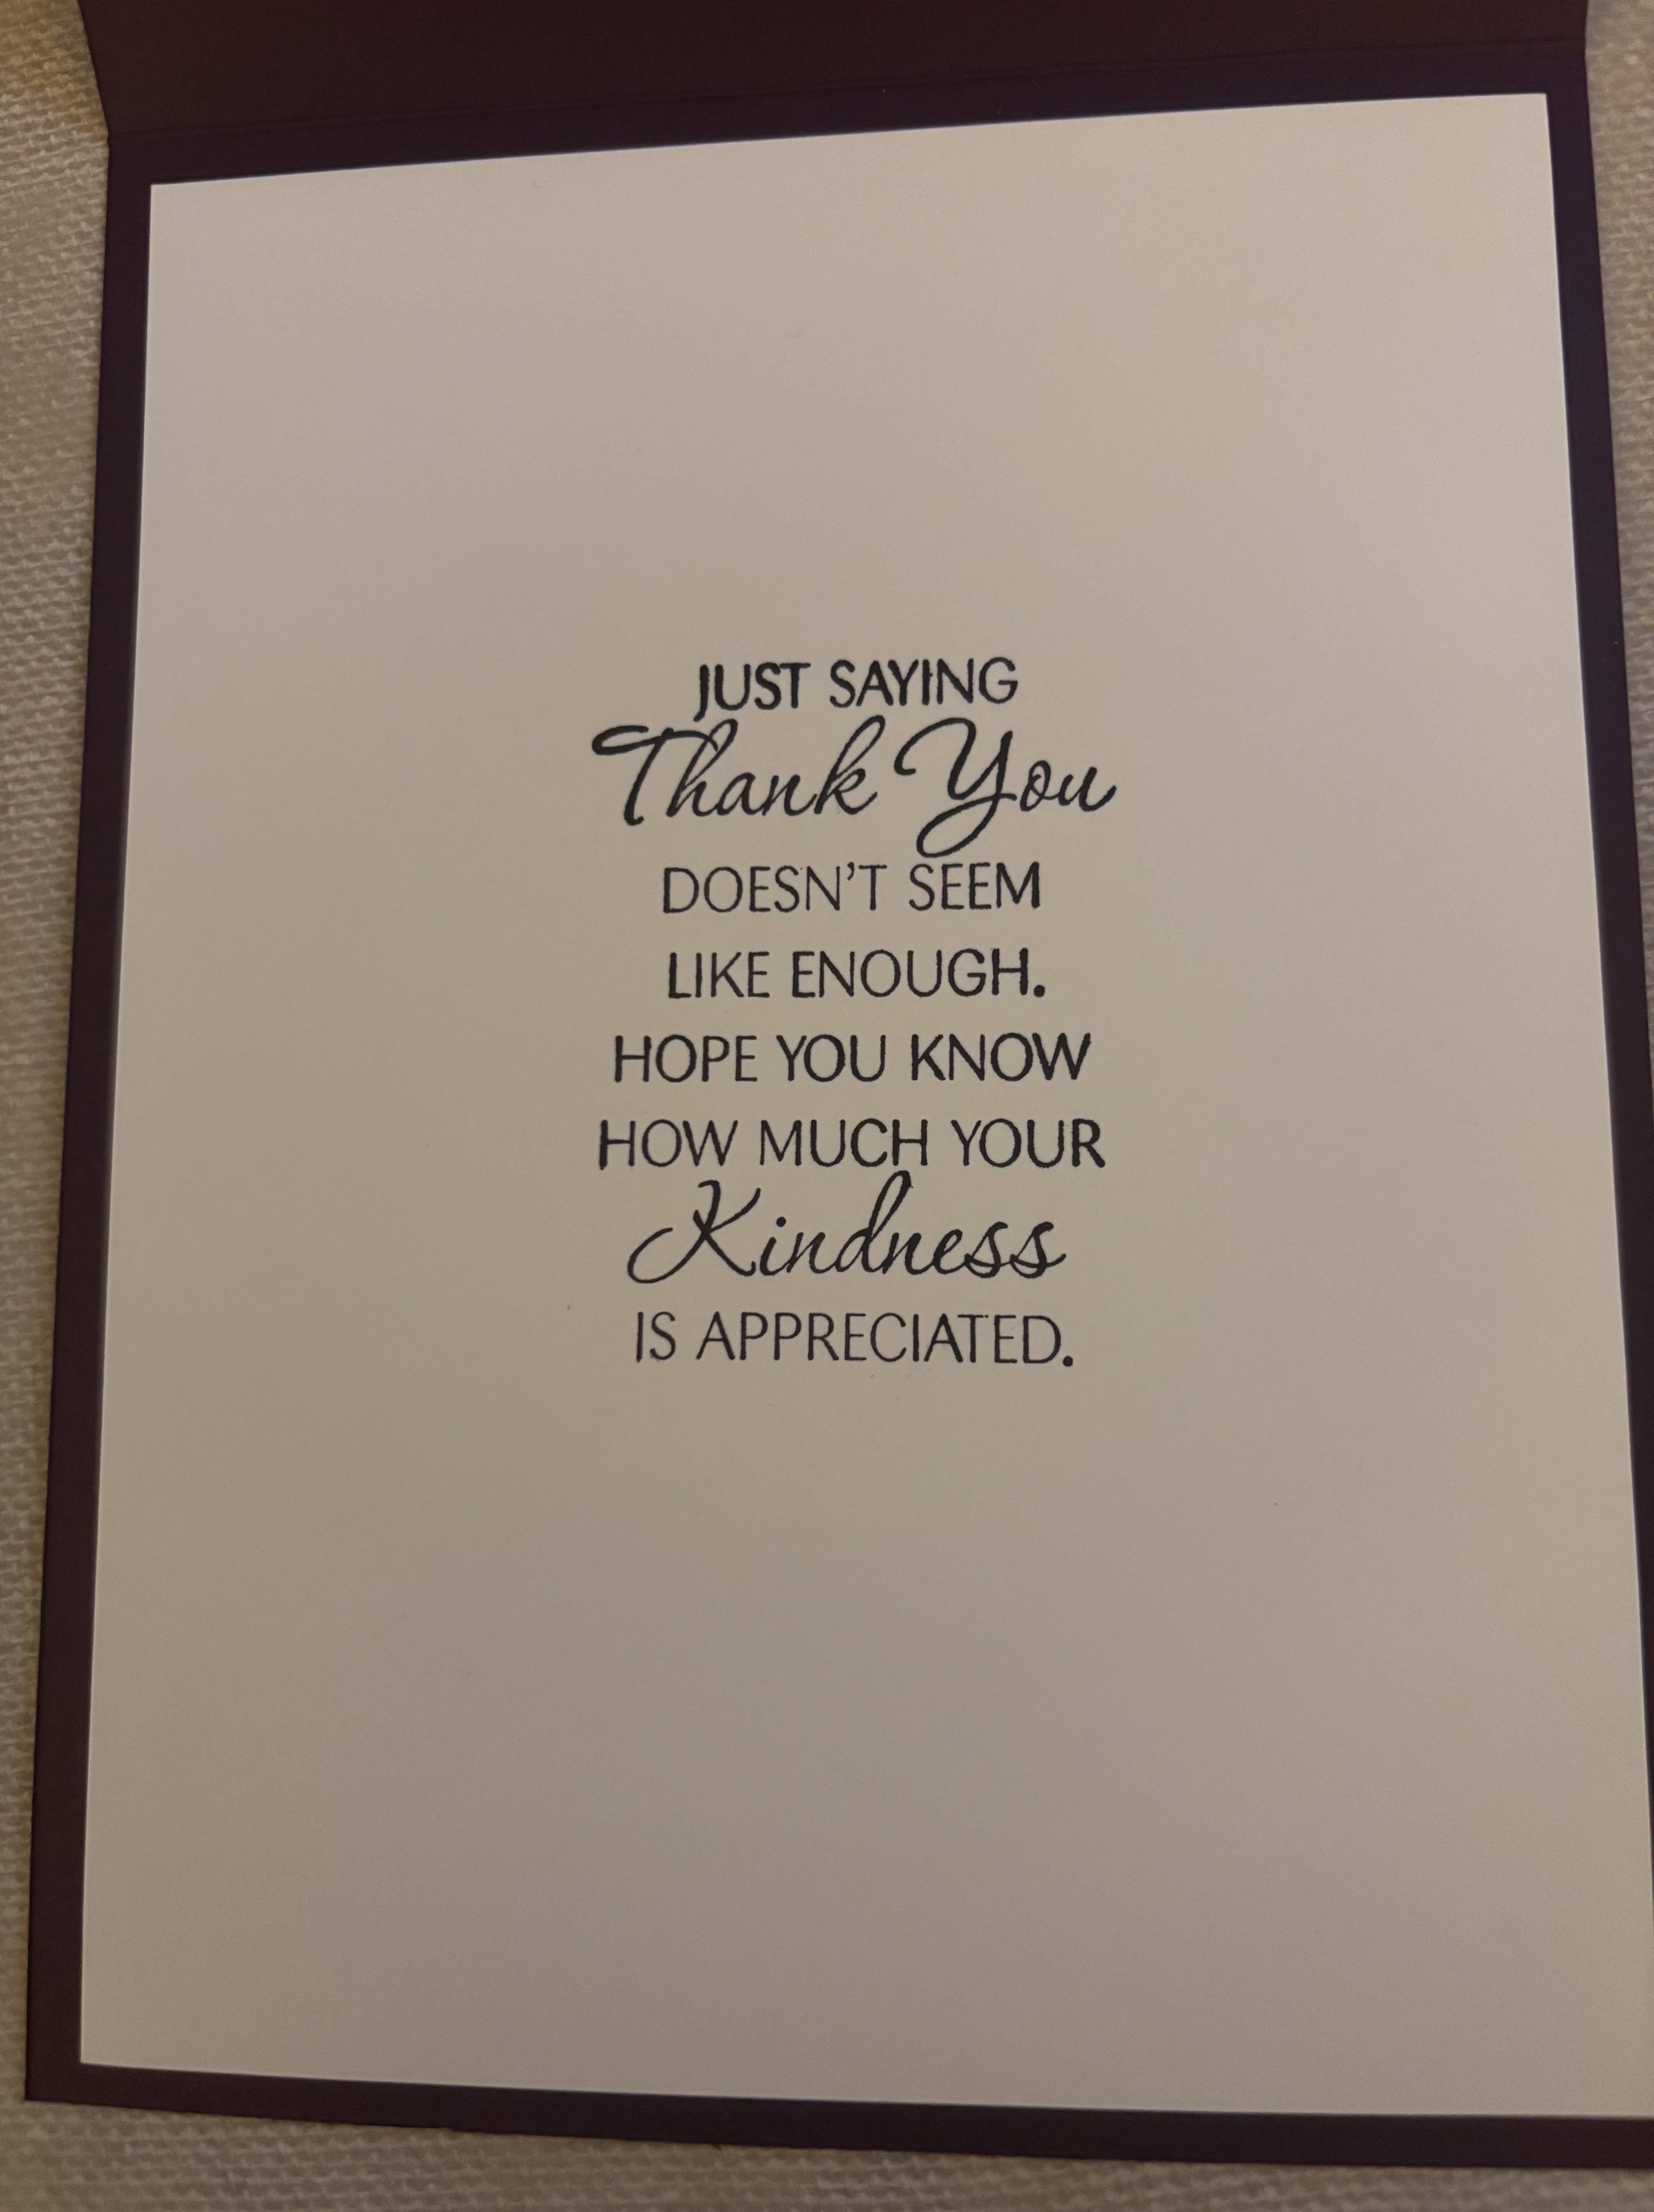
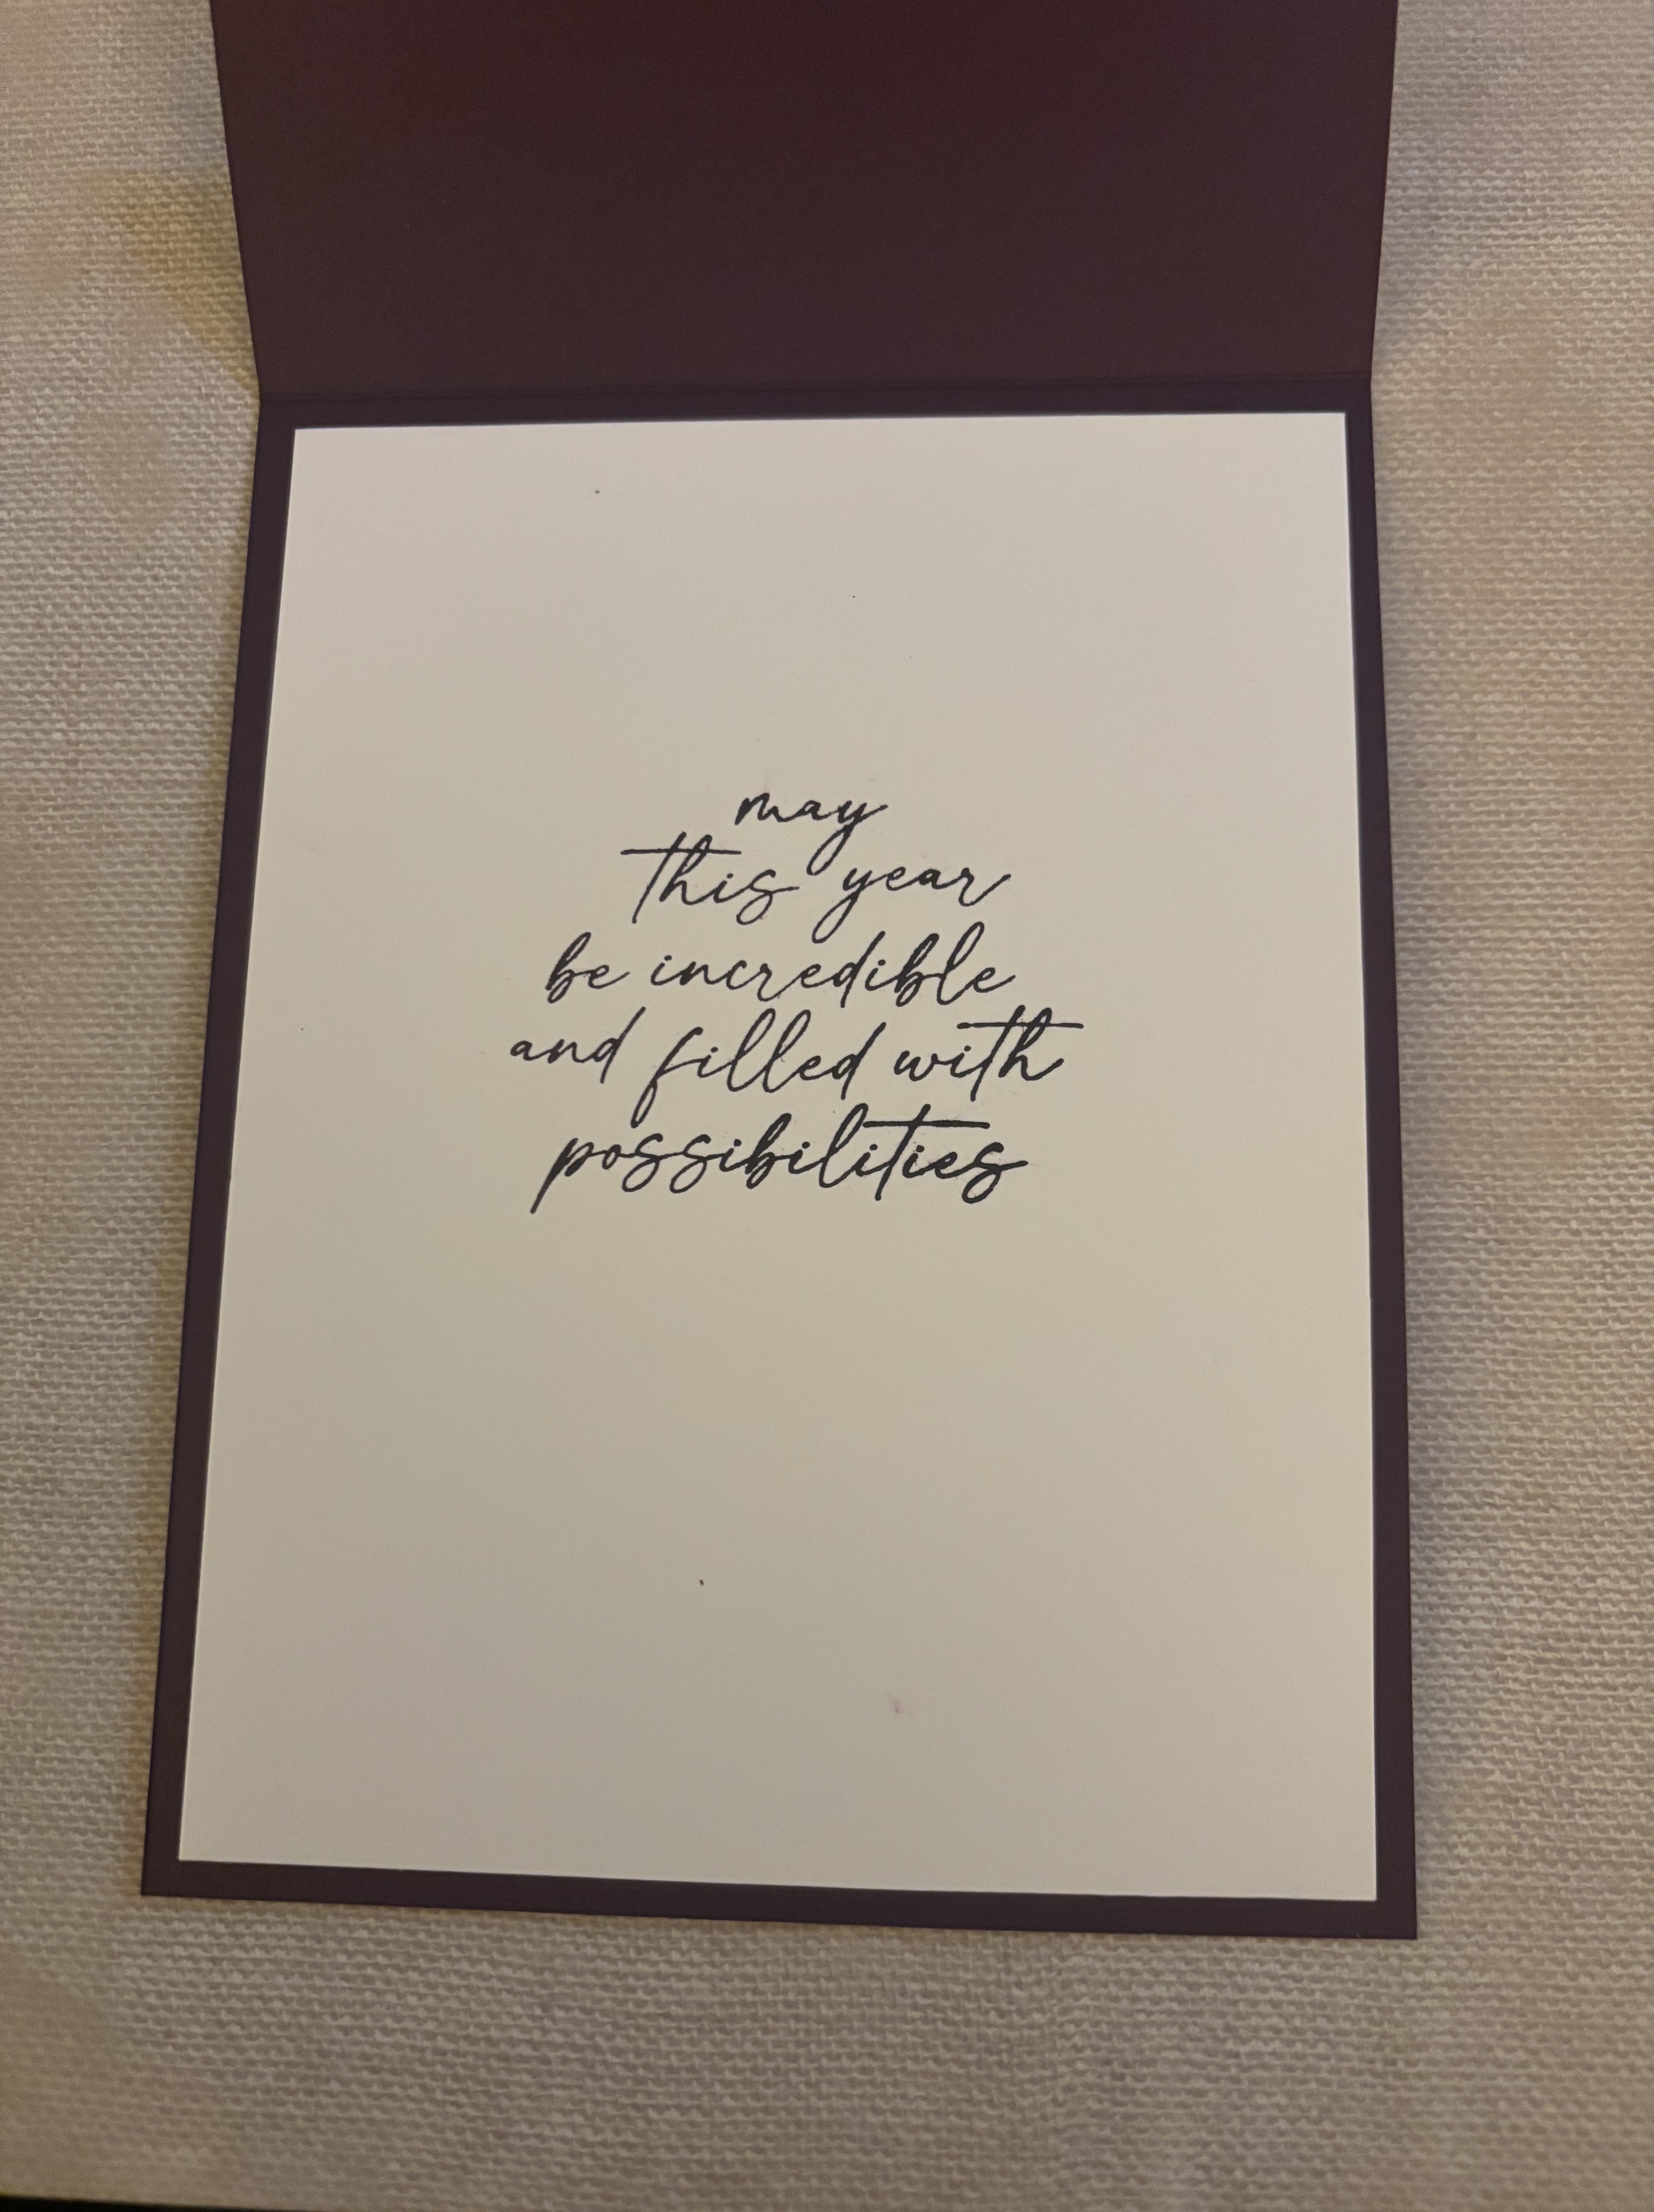
Inside of Card – Basic White 5 1/4 x 4. Stamp Sentiment in center of the card.
Assemble the card
On the top piece of your card add the first layer 4-1/8 x 1-3/8 then add the DSP 4 x 1-1/4.
On the 1 1/2 inch piece that was cut off add the first layer 4-1/8 x 1-3/8 then add the DSP 4 x 1-1/4
On the 2 1/2 inch piece that was cut off add the first layer 4-1/4 x 2-3/8 then add the DSP 4 x 2-1/4
Lay the completed 1 -1/2 inch piece to line up at the bottom of the card and then lay the center piece (portrait) to the center of the front of the card. You will now add glue only to the top and bottom of the center piece and adhere to the top and bottom of the card. Check to picture above to see the placement.
Stamp your sentiment on the oval and then adhere to the scalloped oval. Add to the card using dimensionals.
Stamp the inside sentiment so it is in the center of the card and adhere to the inside of the card.
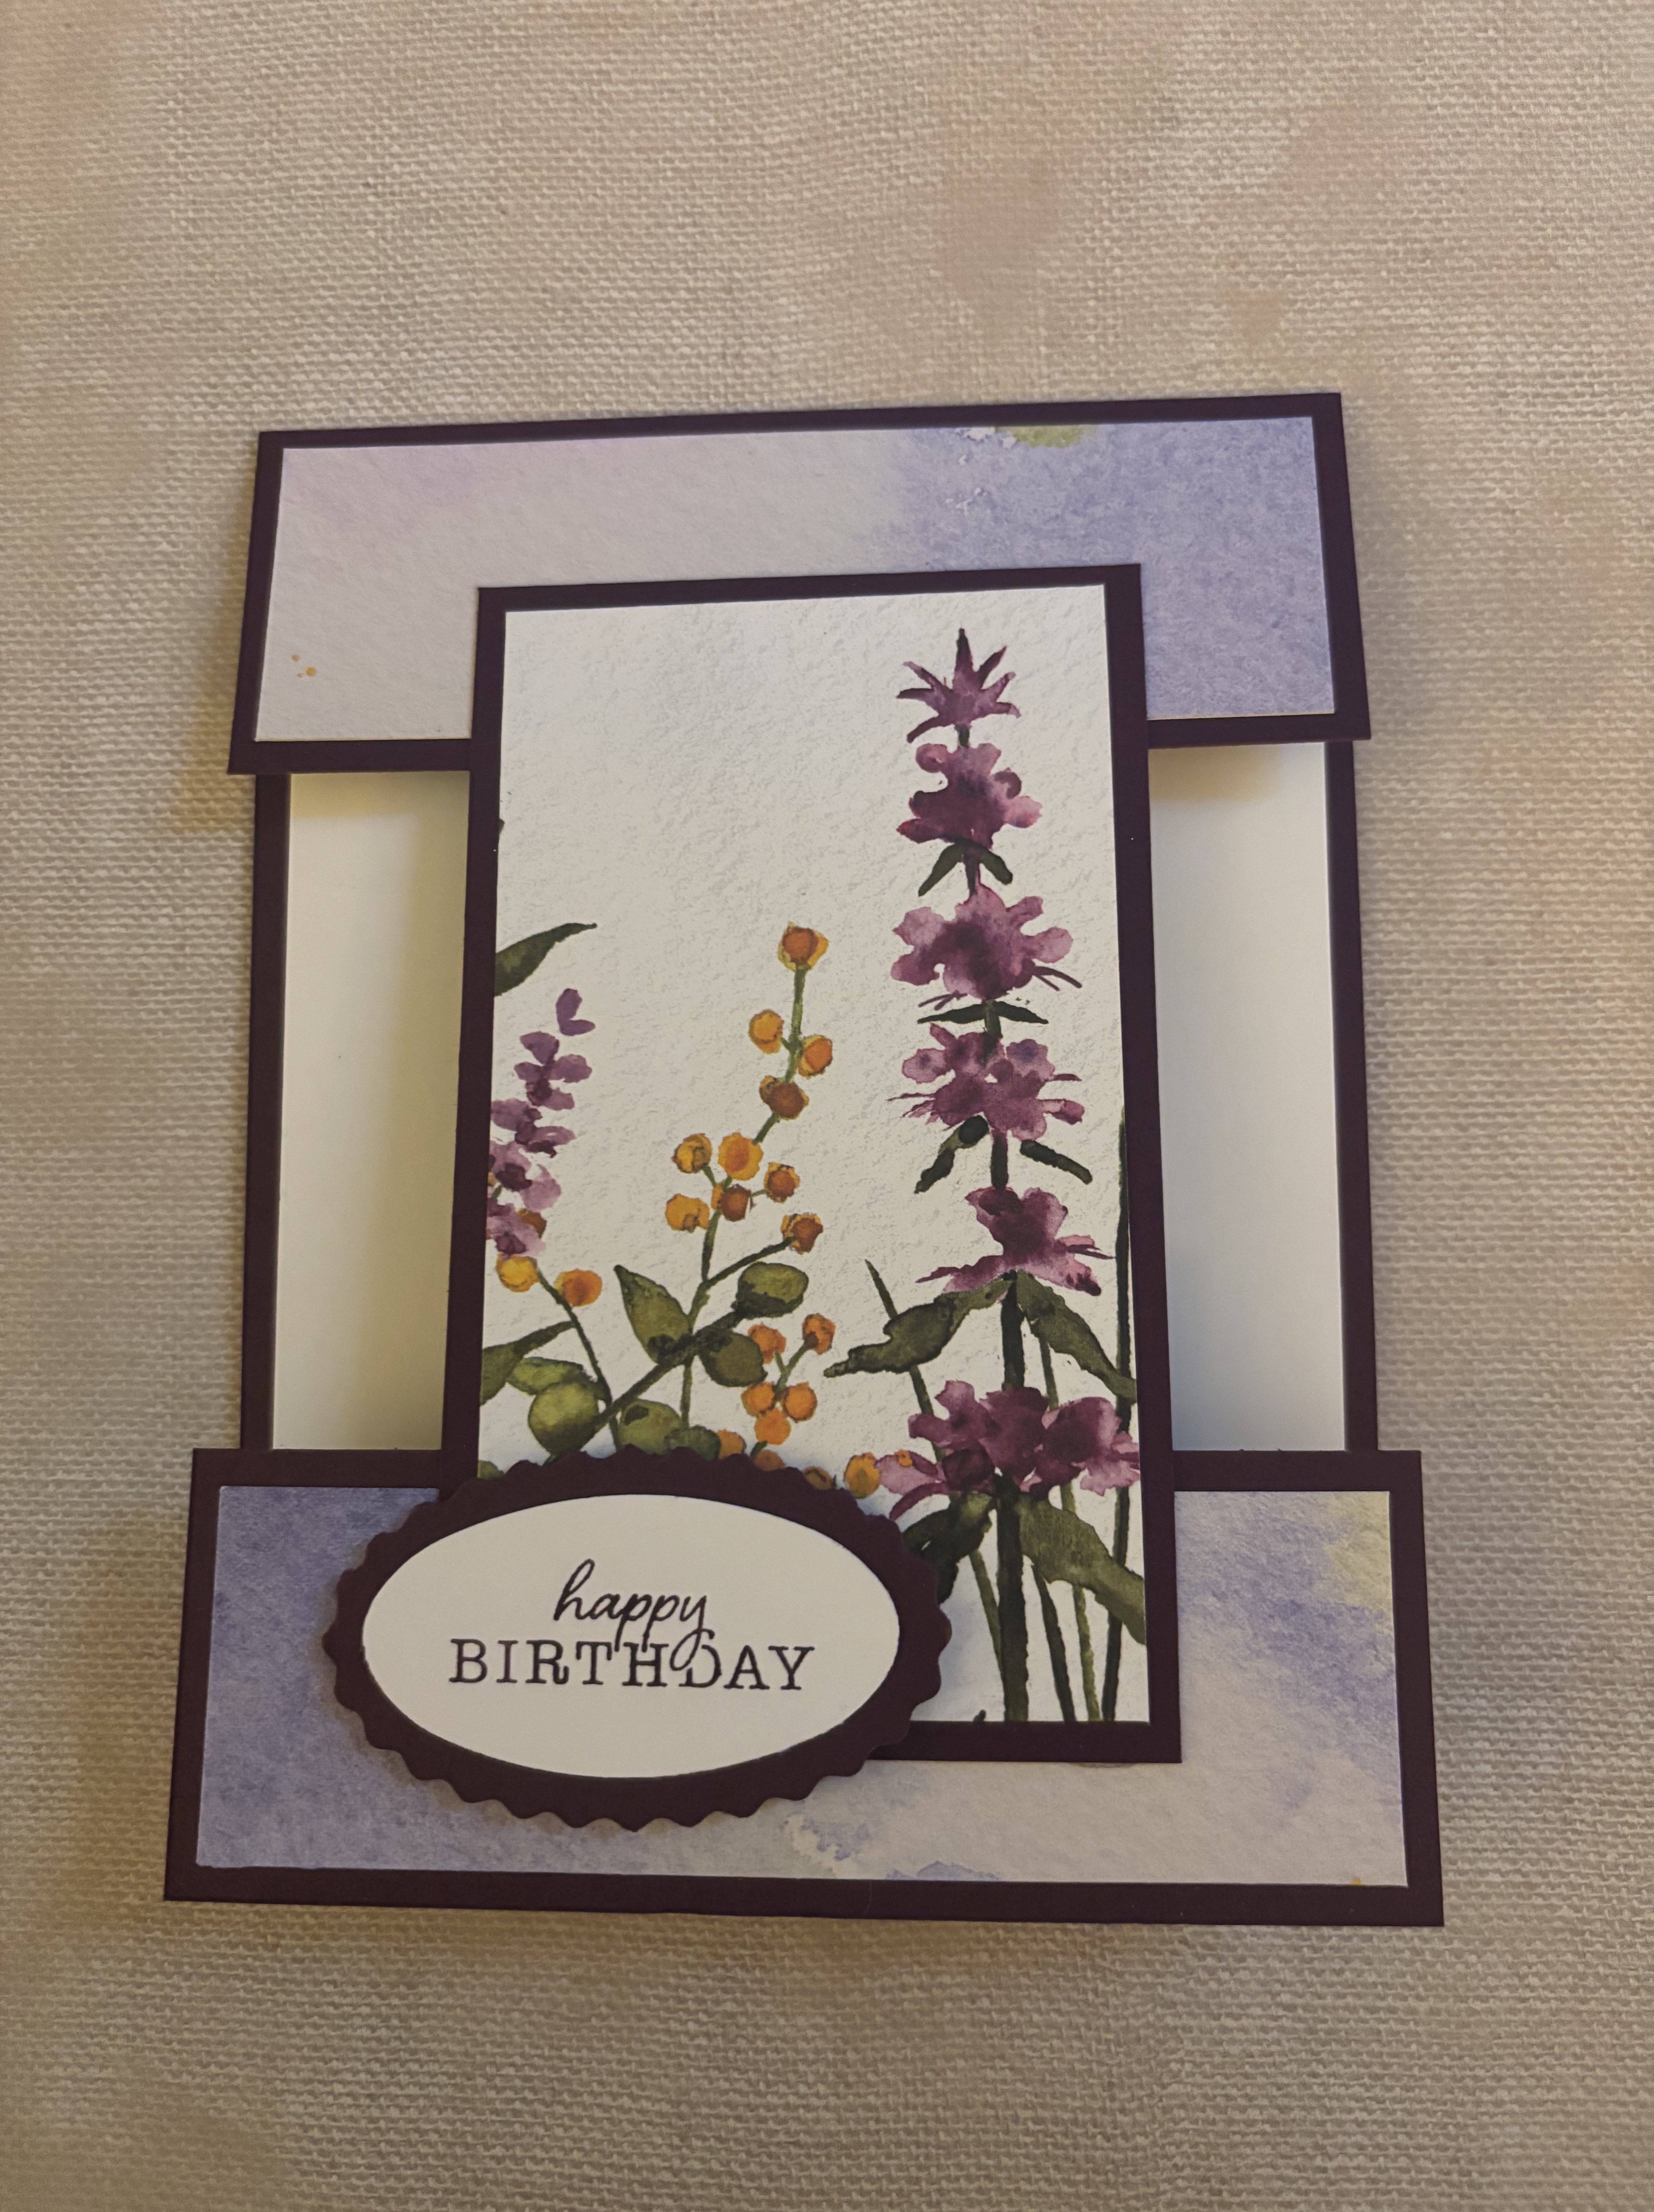
If you don’t want the layered look as above you can only the DSP layer. Card without the First Layer is shown below.
PRODUCTS USED:
Blackberry Bliss Card Stock #133675
Blackberry Bliss Ink #147092
Basic White Card Stock #159276
Fresh Freesia Card Stock #155613
Front Sentiments – Keeping Tabs #163533
Inside Sentiments Stamp Sets – Hope you Know #161409 and Encircled in Nature #163623
Double Oval Punch – Retired
DSP – Retired
Discover more from Stamping With MB
Subscribe to get the latest posts sent to your email.
